Monday, January 21, 2013

Heavy Metal Dinner Medley


This week’s 52 Weeks of Cooking theme was Inspired by Music, so I present you with a heavy metal themed meal:

Thyme Does Not Veal:
Pan Roasted Veal Chops Stuffed with Mushrooms, Spinach, Serrano Ham and Thyme, Topped with a Lemon Thyme Compound Butter

A Vulgar Display of Potatoes:
Duck fat Roasted Potatoes with Thyme, Bacon, and Melted Onions

Rust in Peas:
 Green Peas with Sun-dried tomato pesto

My original idea was to have an all thrash metal inspired dinner, but I couldn’t think of a thrash metal album I could shoehorn into a potato dish, so I went with Pantera instead. Once again I wish I had a grill, if only so I could’ve done the blatantly obvious “Grill ‘Em All” (or if you prefer, “Grilling is my business (and Business is Good)”.

A few cooking notes: For the potatoes, try to use russets if you can. I ended up using some Yukon golds I had, and they had a tendency to stick to the pan, and a few got mushy and crushed with I tried to remove them. Never had that problem with russets, which I assume is due to their starchy-ness.

The compound butter recipe comes from Ruhlman’s Twenty, and the melted onions are from Thomas Keller’s Ad Hoc at Home.

Thyme Does Not Veal: Pan Roasted Veal Chops Stuffed with Mushrooms, Spinach, Serrano Ham and Thyme, Topped with a Lemon Thyme Compound Butter – Inspired by Dark Angel’s “Time Does Not Heal” https://www.youtube.com/watch?v=KeH0FinbW6Q

Stuffing (enough for 2 chops):
4 cups loosely packed baby spinach leaves
1.5 cups sliced crimini mushrooms (about 5 whole mushrooms)
1 large garlic clove
2 slices prosciutto/Serrano ham
¼ cup breadcrumbs
2 teaspoons fresh thyme, chopped
Zest of ¼ lemon
salt

In a dry pan, place the breadcrumbs and heat over medium for about 1 minute, until they start to get some color on them. Remove to a bowl. Splash a little olive oil in the pan, then add the mushrooms and cook until most of their water is released and they start to color, about 6 minutes. Add the garlic and cook for another minute. Add the spinach leaves, turn off the heat, and stir them around until they wilt.

Add the mushrooms, garlic, and spinach to the bowl with the breadcrumbs. Add the Serrano ham, thyme, and lemon zest and stir to combine. Can be made ahead and refrigerated.


Compound butter:
½ cup/8 oz./1 stick butter, room temperature
2 teaspoons shallots
2 teaspoons lemon juice
Zest of 1 lemon
1 tbsp fresh thyme, chopped

In a bowl, work all the ingredients together with your hands. Form the butter into a log shaped, then place on a piece of plastic wrap. Roll the butter in the plastic wrap to form a circular log shape, and refrigerate until firm.

Cooking the Veal Chops:
Cut a pocket into 2 one-inch thick veal chops, and insert half the stuffing into each cavity. Allow the chops to sit on the counter for about an hour to come up to room temperature. Preheat your oven to 350°F, and set an oven safe pan over high heat. Season the chops generously with salt and pepper, and pour some canola oil over the chops themselves. Brown the chops in the pan for 2 minutes per side, then transfer to your oven for about 4 to 5 minutes, until they reach an internal temperature of 130°F. Remove from the oven and let the chops rest for 5 minutes. Serve with a piece of compound butter on top.


A Vulgar Display of Potatoes – Duck fat Roasted Potatoes with Thyme, Bacon, and Melted Onions, inspired by Pantera’s “Vulgar Display of Power” https://www.youtube.com/watch?v=Nx08MK_O_TQ

Melted Onions:
2 white onions, diced
6 tbsp butter, cut into 6 pieces
3 sprigs thyme
1 garlic clove, crushed
2 bay leaves
Parchment paper for a cartouche
Cheesecloth (optional)
Salt

In a large pan, cook the onions over medium low heat (don’t add butter/oil to the pan yet, but do sprinkle some salt on them) until they release all of their liquid, about 20 minutes. Keep the heat pretty low so the onions don’t brown.

Place the thyme, garlic, and bay leaves in a piece of cheesecloth, and tie off with butchers twine to create a sachet. Alternatively, you can just place the 3 ingredients directly on the onions, and fish them out when you’re done cooking.

Place the butter and sachet on the onions, and cover with a parchment paper lid, aka a cartouche. If you’ve never made a parchment lid before, it’s probably easies to head over to youtube for an explanation, courtesy of Michael Ruhlman: https://www.youtube.com/watch?v=YtFS6R93UWY

Let the onions cook, still over medium low heat, for another 30 to 35 minutes, until meltingly tender. If the butter separates or the pan looks dry, add a bit of cold water and stir to emulsify.

Remove the sachet/garlic, thyme, and bay, and place the onions in a bowl. These can be made ahead of time, and you’ll have plenty of leftovers which you can use to top pretty much any meat.


Roasted Potatoes
2 russet potatoes
1 tbsp thyme leaves, chopped
Salt (generous amount – like a tablespoon or thereabouts)
Black Pepper
1 tbsp duck fat
2 slices bacon

Dice the potatoes (skin on or off, whatever your preference), and place in a bowl with the thyme, salt, and pepper and toss to coat the potatoes.  Add the duck fat, and toss to coat. Place in an 8x8 baking dish, and roast at 425°F for 45 minutes, flipping the potatoes over after about 30 minutes.

Meanwhile, cook 2 slices of bacon in a pan until crispy, and remove to a paper towel. Cut into small pieces and reserve.

When the potatoes are done, remove from the oven, and place in a serving bowl along with the bacon and melted onions.


Rust In Peas – Green Peas with Sun-dried tomato pesto, inspired by Megadeth’s “Rust in Peace” https://www.youtube.com/watch?v=4l9WbnqFSw8

Frozed Green Peas (however many you want to serve)
¼ cup sun-dried tomatoes, diced
1/3 cup olive oil (I used some of the oil the tomatoes were packed in, and some extra virgin olive oil to make up the difference)
1 large garlic clove, roughly chopped
¼ cup walnuts, roughly chopped
¼ cup parmesan cheese
1 teaspoon dried basil (use fresh if you have it)
Pinch of red pepper flakes
Salt and pepper

In a small food processor, add the tomatoes, garlic, walnuts, parmesan, basil, and red pepper flakes, and turn on the food processor. Pour in the oil, and process until smooth. Season with salt and pepper to taste. Can be made in advance and refrigerated.


Bring a small pot of salted water to a boil, and cook the peas for about 3 minutes, until cooked through but still with a little bite to them. Drain, and place back in the pan. Add pesto as needed and serve.


Sunday, January 13, 2013

KFC: Korean Fried Chicken


Korean is not a cuisine I’m familiar with, so I decided to go with a Korean take on something familiar: fried chicken. The ingredient that makes all the difference is gochujang, an aromatic chili paste made from red chili, rice, fermented soybeans and salt. It’s moderately spicy, with an aroma that reminded me of a mix of soy and stewed plums. The honey adds a good bit of sweetness to the sauce, which it’s worth noting is quite sticky, so grab some extra napkins before you dig in. Recipe from: http://www.saveur.com/article/Recipes/Korean-Fried-Chicken

Sauce:
4 cloves garlic
1.5 inch piece of fresh ginger
3 tbsp gochujang
3 tbsp soy sauce
1.5 tbsp rice vinegar
1 tbsp sesame oil
1 tbsp honey

Chicken:
16 chicken wings
2/3 cup flour
1 tbsp. corn starch
2/3 cup water
Canola oil for frying


For the sauce:
Chop the garlic and ginger in a food processor, add the remaining ingredients and pureé. Pour the sauce into a large bowl and set aside.


For the chicken:
Pour canola oil into a pot or dutch oven to a depth of 2 inches. Heat to 350°F. Meanwhile, in a bowl mix the flour and corn starch. Add the water and whisk. Add chicken wings to coat, then fry the wings in two batches. Fry for 6 to 8 minutes until golden. Remove to a plate lined with paper towels to sop up excess oil. Repeat with the second batch of wings. Return the first batch to the oil (make sure it comes back up to 350°F between batches), and fry for an additional 6 to 8 minutes, until crispy.

After the frying, before the sauce

When all of the wings have been twice fried, toss them in the sauce to coat and serve.


Mint Chocolate Chip Ice Cream Sandwiches

This is the first time I’ve ever made ice cream, and since I don’t own an ice cream maker I figured the Food Lab method was the way to go (recipe: http://www.seriouseats.com/recipes/2010/07/vanilla-ice-cream-without-the-machine-recipe.html). I modified the recipe slightly to incorporate mint and chocolate chips. I’m not sure why, but my end result was very creamy and not very icy. It started to melt almost immediately, and I’m not entirely sure where I went wrong. On the plus side, the flavor was spot on, with the mint offering a nice fresh taste without being overwhelming. The chocolate chip cookie recipe is my favorite standby, the one right off the back of a package of Hershey’s chocolate chips.

Mint Chocolate Chip Ice Cream:
12 oz. Evaporated Milk
½ cup loosely packed mint leaves
8 egg yolks
1 cup sugar
2 teaspoons vanilla extract
¼ teaspoon kosher salt
Green food coloring
2 cups heavy cream (divided)
3.5 oz chocolate, chopped (I used Ghiradelli 72% cacao)

Rinse the mint leaves, dry them off, then place in a pot with the evaporated milk. Heat over medium until the liquid simmers (don’t put the heat too high, or the milk will scorch), then remove from heat and let steep for 20 minutes.

While the evaporated milk is infusing, fit your stand mixer with the whisk attachment. Separate your egg yolks, and add to the bowl of the mixer along with the sugar, vanilla, salt, and 5 drops of green food coloring. Whisk over medium for 4 minutes, until:
A)   The mixture coats the back of a spoon
B)   You can run your finger through that coating without it running together

Set the egg mixture aside. Strain the evaporated milk mixture, and add the milk, sans mint leaves, back to your saucepan. Heat over medium until it returns to a simmer. Slowly add the simmering milk to the egg mixture, whisking constantly, until incorporated. Don’t add the milk too fast, or you’ll end up with scrambled eggs.

Transfer the mixture to a saucepan and heat, whisking constantly, until the mixture hits 180°F. Again, heat slowly so it doesn’t scorch, whisk constantly and don’t let it get too hot or you’ll have scrambled eggs. Chill the mixture completely.

Beat 1 cup heavy cream until doubled in volume. Fold into the egg mixture until incorporated. Pour the mixture into 2 ice cube trays, and freeze for at least 4 hours.

In a food processor, add the ice cream mixture and the remaining cup of cream. Process until smooth, about 30 seconds.  Fold in the chopped chocolate, and place the mixture in a 1 quart container, freezing for at least 4 hours before serving.


Hershey’s Chocolate Chip Cookies:
2 ¼ cups flour
½ teaspoon salt
1 teaspoon baking powder
1 cup/8 oz/2 sticks butter, softened
¾ cup granulated sugar
¾ cup packed brown sugar
1 teaspoon vanilla extract
2 eggs
2 cups (one 12 oz. package) chocolate chips

Mix the flour, salt, and baking powder together in a bowl. In another bowl, or a stand mixer, beat the butter, sugar, brown sugar, and vanilla together for 3 minutes, until creamy. Add the eggs and beat for 2 minutes more. Gradually add the flour mixture, beating well to incorporate. Fold in the chocolate chips.

Preheat the oven to 375°F. Prep your baking sheets, and drop the cookie mixture onto the sheets, 1 to 2 tablespoons for each cookie depending on how large you want them. Make sure the cookies aren’t too close together, especially if you’re making larger cookies. Bake for 8 to 10 minutes, until lightly browned around the edges. Cool on the sheets for 2 to 3 minutes, then remove to wire racks to cool.


Monday, January 7, 2013

Ham, Pea, and Mint Risotto


Do you like mint? That’s cool. I don’t. I guess it just reminds me too much of toothpaste. However, since this week’s themed ingredient was mint, I forged ahead anyway, and decided to do a savory dish instead of an obvious mint/chocolate dessert combo. I do like how the mint acts as a fresh herb to cut through the richness of the rest of the dish; I just wish it didn’t taste so… well, minty. If you happen to like mint, however, I think you will really enjoy this recipe:

Ham, Pea, and Mint Risotto:
2 shallots, diced
2 cloves garlic, diced
1.5 tbsp Bacon grease
1 cup Arborio rice
½ cup dry white wine or vermouth
4 cups chicken stock
1 cup frozen peas
4 tbsp chopped fresh mint
¼ lb. Smoked ham, chopped into pieces
3 tbsp butter
Black Pepper
Parmesan Cheese
Green Onions
Salt (optional)

Pour your stock into a medium sized pot and bring to a bare simmer. Keep the stock at this temperature for the duration of the process – adding the hot stock to the risotto aids the cooking process.

Heat a medium sized pan over medium-low/medium and add the bacon grease. When the grease is melted, add the shallots, and cook for about 3 minutes, until translucent. Add the garlic and cook for another minute. Add the rice, stirring to coat, and toast for about 1.5 minutes.

Pour in the white wine, and cook until the wine is evaporated/absorbed. Add 1 cup of the stock, stirring frequently. When the stock has been pretty much all absorbed, add in another half cup, again stirring and waiting for the stock to be absorbed by the rice. Repeat this process until the stock is all used up, about 17 minutes. After the last addition of stock, add in the the peas and ham. The ham just needs to warm up, and the peas only take about 3 minutes to cook.

When the rice is fully cooked, turn off the heat and stir in the butter and mint. Season with black pepper and salt (shouldn’t take much – also, the parmesan you’ll be garnishing with adds saltiness). Serve with grated parmesan, an extra crack of black pepper, green onions and mint leaves for garnish.

Sunday, January 6, 2013

Chocolate Banana Cupcakes with Nutella Cream Cheese Frosting


Philadelphia has a few of the ever so trendy cupcake trucks patrolling the streets, and the best known of the bunch (Buttercream Cupcakes aka the Cupcake Lady) had taken up temporary residence for a while down the block from my office. I was sort of skeptical about how good cupcakes could be, but one bite into a banana cupcake with nutella buttercream frosting and I was hooked. I think the cupcake lady opened up a legit store, so she doesn’t come around much anymore, but these were definitely inspired by her recipe. Just with more chocolate. Recipes for the cupcakes and frosting from http://www.joyofbaking.com/cupcakes/BananaChocolateCupcakes.html and http://www.inquiringchef.com/2012/11/26/nutella-cream-cheese-frosting/ respectively.

For the Cupcakes (yields 12):
200 grams (1 cup) granulated white sugar
130 grams (1 cup) all purpose flour
35 grams (1/3 cup) cocoa powder
¾ teaspoons baking powder
¾ teaspoons baking soda
¼ teaspoon salt
1 large egg
½ cup mashed ripe bananas (~1 medium sized banana)
½ cup (120 ml) warm water
¼ cup (60 ml) milk
¼ cup (60 ml) canola/vegetabale oil
¾ teaspoon vanilla extract.

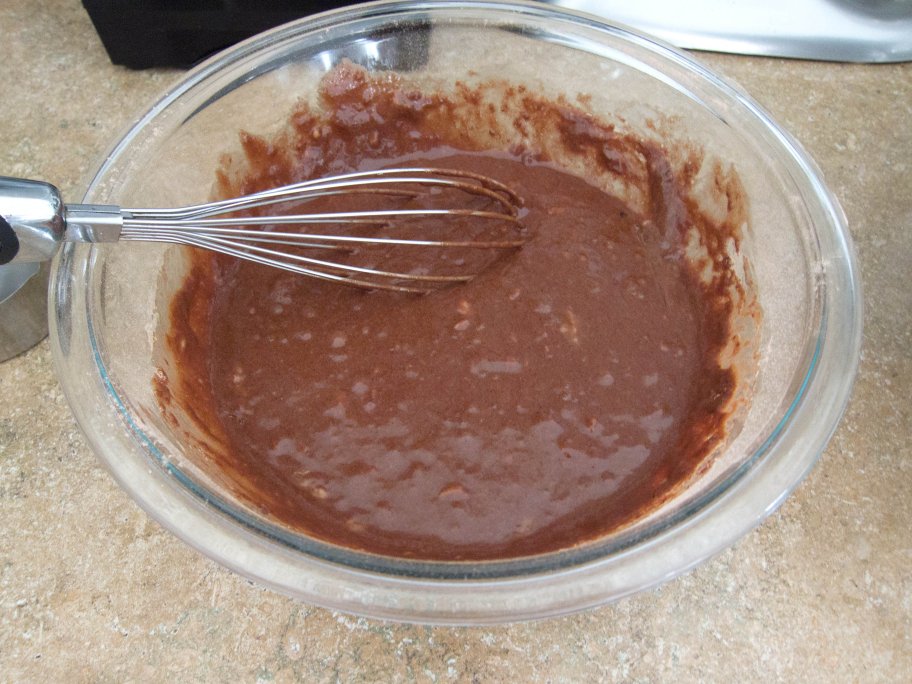
Whisk together the sugar, flour, cocoa powder, baking powder, baking soda, and salt. My cocoa powder was clumpy, so I ended up sifting all the dry ingredients into another bowl. In a different bowl, whisk the egg, bananas, water, milk, oil, and extract together. Pour the wet batter onto the dry ingredients, and whisk to combine (don’t over mix, you want everything to just combine).

Move your oven rack to the center of the oven and preheat to 350°F. Line a muffin tin with 12 paper liners, and scoop the batter into each muffin cup, about ¾ full (I used a scant ¼ cup of batter for each). Bake for 20 minutes, until a toothpick inserted into the center of a cupcake comes out clean. Let cool on a wire rack before frosting.

For the Nutella Cream Cheese Frosting:
60 grams (2 oz.) cream cheese, room temperature
60 grams (4 oz., half a stick) unsalted butter, room temperature
120 grams (1 cup) powdered sugar
12 grams (2 tablespoons) cocoa powder
155 grams (1/2 cup) nutella

In the bowl of a stand mixer fitted with the beater attachment, add the cream cheese and butter and beat on high for 5 minutes, until the mixture is light and smooth. Add the powdered sugar and cocoa powder, and mix on low until the ingredients are combined. Turn up the speed to high, and beat for 2 more minutes, until the mixture is light and fluffy. Add in the nutella and mix on low, until combined (don’t overmix, or the frosting will get grainy).

Spread the frosting on the cupcakes, and garnish with slices of banana.


Wednesday, January 2, 2013

Argentinian Big-Bellied Beef Empanadas with Red Chimichurri


I recently purchased Gran Cocina Latina, and I gotta say, holy shitballs it's amazing. It's 900 pages of exhaustive research travel from Maricel Presilla, co-owner and chef of two Latin restaurants in Hoboken, N.J. This is the first recipe I've tried, but I dare say that this book is on par with Marcella Hazan and Julia Child.

On to today's recipe: these empanadas are fantastic, but dear god do they take a while to make if you aren't familiar with assembling empanadas. If you're not up for devoting a few hours in the kitchen, I'd consider making the stuffing and dough one day, and assembling and baking these off the next. A few notes on autheticity:

  • The dough traditionally uses suet as the fat. You can substitute with lard, or if like me you can't find any in the grocery store use a mix of bacon fat and vegetable shortening.
  • Speaking of tradition, lean beef, such as beef shin, is usually chopped small for the filling; I  substituted ground beef.
  • The recipe for the filling also incorporates (3) hard-boiled eggs and (24) black olives. I omitted the black olives because I can't stand them, and the eggs I boiled turned out soft instead of hard. Whoops. The recipe in the book recommends spreading the eggs/olives over the beef mixture once it's cooled. Makes it easier to spoon the filling onto the dough.

This recipe will make 24 empanadas. I ended up with 15.6 ounces of leftover dough as well, which I froze.

For the Dough:
2 lbs. low gluten flour such as Argentinian Blanca Rosa 000 or cake flour
2 teaspoons salt
2 teaspoons sugar
1/2 cup bacon fat
1/2 cup vegetable shortening
2 extra large eggs
1 1/4 cup cold water

Combine the flour, salt and sugar. Blend in the fat/shortening, using a pastry blender or your hands, until the fat is the size of pebbles. Mix the eggs and water in a bowl, and slowly incorporate it into the flour to form a dough. Turn out on a lightly floured surface, and knead for 5 minutes until smooth. Split in half and roll into two 12 inch or so logs. Cover with plastic wrap, and place in the fridge for at least 1 hour or up to 24.


For the filling:
1/4 cup extra virgin olive oil
3 large garlic cloves, finely chopped
2 large yellow onions (10 to 12 ounces), finely chopped (about 4 cups)
4 scallions, white and light green parts only, finely chopped
1 medium orange bell pepper, deseeded, deveined and finely chopped
1 lb. ground beef
1 tablespoon salt
2 teaspoons ground black pepper
1 teaspoon cayenne
1 teaspoon smoked paprika
2 teaspoons ground cumin
2 teaspoons dried oregano

Heat the oil in a large skillet over medium, add the garlic and cook for 40 seconds until golden. Add the onions, scallions, bell pepper as well as all the seasonings and let cook for 7 minutes, or until the onion and pepper are softened. Add the meat and cook for another 4 to 5 minutes, until cooked through but still juicy. Transfer to a baking dish, and spread with a spatula. Refrigerate until cooled. While that's cooling down, it's time for the chimichurri.


Red Chimichurri:
1/2 cup chopped cilantro
1 large head of garlic (12 cloves), peeled
1 small yellow onion (5 ounces), finely chopped
1 tablespoon dried oregano
1 tablespoon smoked paprika
1 tablespoon, crushed red pepper flakes
1/2 cup of red wine vinegar
1/2 cup extra virgin olive oil

I used the slicer on my food processor to chop the garlic. You can use a knife if you want to deal with it that way. Add everything else to the food processor, and pulse until the ingredients are finely chopped, but not pureed. Serve at room temperature. This will keep in the fridge for 2 to 3 weeks.


Assembly:
2 large eggs, beaten with 2 tablespoons of cold water for an egg wash

You'll need to use a 5 inch round ring/cookie cutter/improvised object. The lid of my sugar container measured 5 inches, so I popped it off and used that.

Cut each log into 12 one-inch pieces, keeping the dough you're not working with covered with a towel.  On a wooden cutting board, knead a piece of the dough into a circle. Using a rolling pin, roll out the dough to between 1/8 and 1/16 inch thickness. Using your handy-dandy template, cut the dough into a 5 inch circle. Spoon a healthy 2 tablespoons filling onto the center of the dough, then fold the bottom of the dough onto the top.

Press the edges of the dough to seal. Fold one corner into a triangle. I made pleats in the dough by placing my finger onto the dough, lightly applying pressure, then rolling the next section of the dough up and repeating. It takes a little while to get the hang of assembling these, but since you'll be repeating this 24 times you'll no doubt get the hang of it.


Preheat your oven to 375F. Place the assembled empanadas on two parchment-paper-lined baking sheets, and brush the egg wash generously onto them. Bake for 25 to 30 minutes, until the crusts are golden (mine didn't quite get that color on them), and the empanadas sound hollow when tapped on the bottom.